|
So this will be the first of my Step by Step tutorial series I hope to do this year. The Step by Step series will be super simplified click by click tutorials and walk-throughs, or as close as I can get without writing a whole novel.
This first one is nice and easy and is pretty much a direct copy from Michel Oosterhof's setup guide HERE on Github. I've added a couple of notes at the start for my own reference.
Please note I'm running Debian Stretch (Version 9.3), if you are running a different version, please check the commands and references are still applicable for your system
I'm installing Debian Stretch from ISO on my lab. If you're installing a full fat all whistles OS then you can probably skip this step. If, like me, you are installing a minimal distro or just using disc 1 of the CD/DVD installer, you probably want to make sure your apt sources are correct. You can check you apt sources with the following command:
cat /etc/apt/sources.list
You need to check that you have the following entries in the file. If you don't, you need to add them in and comment out the line referencing the cdrom media. The repos for Debian can be found HERE, for all other distros, you can search the internet.
deb http://deb.debian.org/debian stretch main
deb-src http://deb.debian.org/debian stretch main deb http://deb.debian.org/debian stretch-updates main deb-src http://deb.debian.org/debian stretch-updates main deb http://security.debian.org/debian-security/ stretch/updates main deb-src http://security.debian.org/debian-security/ stretch/updates main First thing with any new installation, make sure you've updated all your packages by running the "apt-get update && apt-get dist-upgrade" command followed by a reboot. The default installation I'm using does not include "sudo" so you can install it or "su root" to perform the following. As using sudo is best practice, I'll install it below as well.
su root
apt-get update && apt-get dist-upgrade apt-get install sudo Now add your user to the sudo group. In the example below "adduser" is the command, "test" is my user and "sudo" is the default sudo group.
adduser test sudo
Now exit out of root and your user account to get back to the main login prompt. When you log back in again your user account should be able to sudo. Test with "sudo apt-get update".
exit
exit Login: sudo apt-get update If you have any problems setting up sudo you can troubleshot or just su to root for commands that require sudo. The following instructions for installing Cowrie are basically the same as the install guide provided by Michael Oosterhof on Github HERE, so full credit to him for this section and for creating and maintaining Cowrie. Install required packages.
apt-get -y install git virtualenv libmpfr-dev libssl-dev libmpc-dev libffi-dev build-essential libpython-dev
Now add a user to run cowrie with a disabled password so it cannot be logged into directly. You can accept all the default prompts when creating the account as no additional details are required, or you can add information if you want.
sudo adduser --disabled-password cowrie
su to the Cowrie account to install and setup Cowrie itself.
sudo su cowrie
Now change directory to cowrie's home directory and pull down the files for Cowrie from Github.
cd ~
git clone https://github.com/micheloosterhof/cowrie Change directory to the new cowrie directory and copy the config template to a new config file.
cd cowrie
cp cowrie.cfg.dist cowrie.cfg If you're deploying this in a production network then I hope you'll be using more resources than just this blog. You'll be wanting to listen on port 22 which requires use of either a port forward in iptables or authbind as non-root accounts cannot run services on "well-known" ports. Both methods are described in Michel Oosterhofs guide. I'm running this as an internet facing honeypot on an internal network so am happy running Cowrie on the default high port (2222) and configuring port forwarding on an upstream firewall. So all I need to do is un-comment the following line in "cowrie.cfg".
listen_port = 2222
Depending on what you're using your honeypot for you will want to edit the default username and passwords accepted by cowrie. These are configured in the following file.
~cowrie/data/userdb.txt
If you just want to log connection attempts with username and password attempted, remove all user/password combinations. If you are wanting to monitor activity once a connection is established, you will want to sent a strong, but not too strong, password for the root account. You will probably also want to use a different internal file system than the default, as well as some other non-default settings, which will be discussed in a future blog post. Now we create the virtual environment for Cowrie. The virtualenv application is a virtual container for python projects to keep all of the dependencies isolated between projects. This is because Cowrie is primarily written for Python 2. WARNING! Virtualenv is NOT a sandbox. If someone manages to escape from Cowrie, they will not be isolated by virtualenv.
virtualenv cowrie-env
Now activate the virtual environment and install and required dependencies within the virtual environment. After you activate the virtual environment, the prompt should change with the name of the environment appended to the start of the prompt. The dependencies list in requirements.txt should be automatically created when the environment is activated.
source cowrie-env/bin/activate
pip install --upgrade -r required.txt Now, drop out of the virtual-env with the "exit" command and check you're still the cowrie user. If not, su back to the cowrie account before continuing. We're pretty much done now so start up cowrie.
cd ~/cowrie/bin
./cowrie start And test from a machine with connectivity and you should receive a login prompt when connecting by SSH to your chosen port. 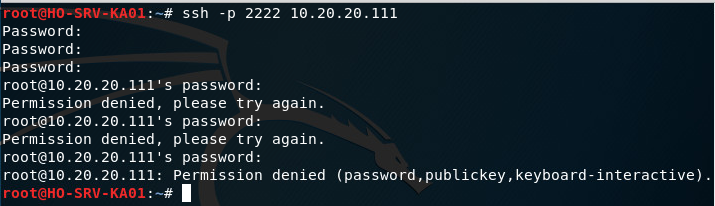
Cowrie should now be up and running and ready to go. You can see the local logs in ~cowrie/data/log/cowrie.log. Additional log forwarding and a number of other options will be discussed in future blog posts. sludge
23 Comments
5/9/2022 05:52:07 pm
Really informative article, I had the opportunity to learn a lot, thank you. https://freecodezilla.net/wondershare-filmora-9-free-download/ 30/9/2022 06:37:13 pm
It's great to have this type of content. Good luck with your spirit. Thank you. https://bit.ly/site-kurma 4/10/2022 08:07:11 pm
I think this post is useful for people. It has been very useful for me. Looking forward to the next one, thank you. https://escortnova.com/escort-ilanlari/adiyaman-escort/tut-escort/ 5/10/2022 11:09:49 am
It was a post that I found very successful. Good luck to you. https://escortnova.com/escort-ilanlari/aydin-escort/kuyucak-escort/ 6/10/2022 01:18:10 pm
I support your continuation of your posts. I will be happy as new posts come. Thank you. https://escortnova.com/escort-ilanlari/van-escort/baskale-escort/ 8/10/2022 08:29:09 am
Thank you for your sharing. I must say that I am successful in your content. https://escortnova.com/escort-ilanlari/rize-escort/iyidere-escort/ 23/11/2022 07:11:54 am
Tıkla evde calismaya basla: https://sites.google.com/view/evden-ek-is/ 11/12/2022 04:16:20 am
Düşmeyen bot takipçi satın al: https://takipcialdim.com/ 11/12/2022 06:34:40 am
Garantili Tiktok takipçi satın al: https://takipcialdim.com/tiktok-takipci-satin-al/ 16/12/2022 11:30:12 pm
uygun fiyatlardan takipçi Hemen Göz At: https://takipcim.com.tr/ 20/12/2022 04:31:39 pm
İnstagram takipçi satın almak istiyorsan tıkla. 7/1/2023 12:26:07 pm
100 tl deneme bonusu veren siteleri öğrenmek istiyorsan tıkla. 29/6/2023 12:32:12 am
En iyi adıyaman ilan sitesi burada. https://adiyaman.escorthun.com/ Leave a Reply. |
AuthorHaven't figured out how to de-capitalize the blog title yet :( Archives
January 2018
Categories |
 RSS Feed
